INTEGRATION INSTRUCTIONS FOR BIGCOMMERCE
FIRST STEP - REORDER THE FIELDS
Let's get started, please log in to your Bigcommerce admin panel.
Please note that Bigcommerce has two versions for the "settings" area in the admin section.
Here are some example to determine which version admin section your store is using.
Please note that the "Newer Style Admin Section" does not have a black menu bar.
Newer Style Admin Section

Classic Style Admin Section

Step 1 (Newer Style Admin Section Only)
If you have determined that you are using the classic style admin section, please skip to the "Step 1 for Classic Style Admin Sections" section below".
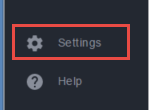
Click on "Settings" (bottom left area of the window).
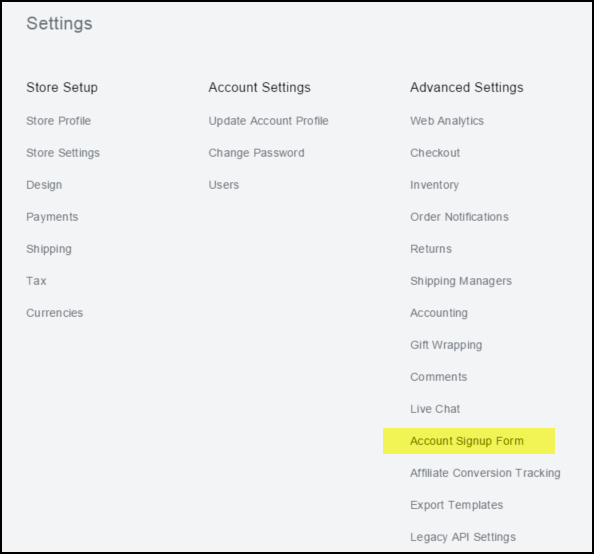
Click on the "Account Signup Form" link (shown below).
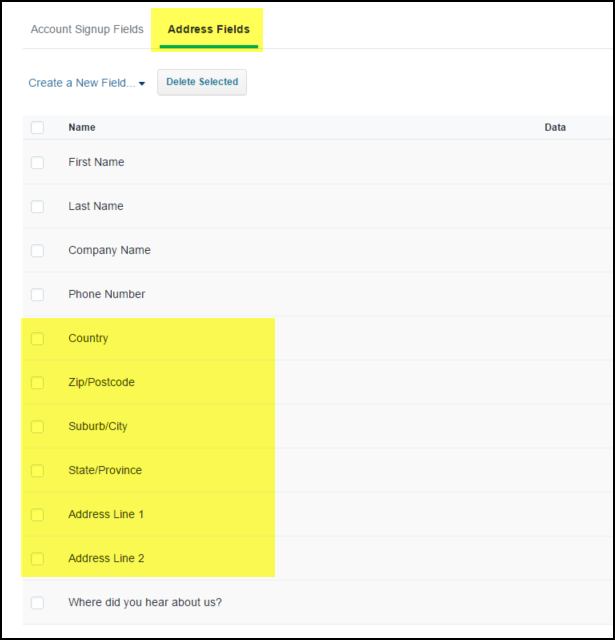
Click on the "Address Fields Tab" as shown below. Now you are ready to reorder the fields on the checkout pages.
The new order will be: Country - Zip - City - State - Address Line 1 - Address Line 2
In order to rearrange the field order, left click on any field and drag the field to the new order location. The field order should match the figure shown below.
Step 1 (Classic Style Admin Section Only)
If you have completed Step 1 above, please jump ahead to the next section - "ADD ADDREXX SCRIPTS (all versions of admin)".
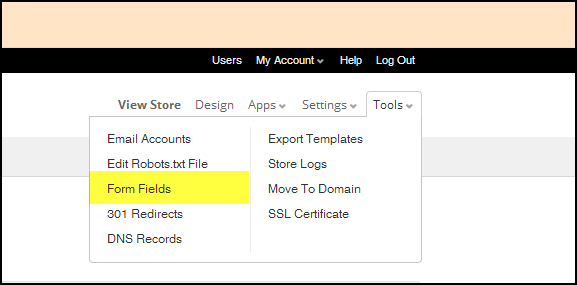
Once logged in Click on "Tools" (upper right area of the window). This will open a dropdown window. Select "Form Fields".
Take a look at the figure shown below.
Select "Address Fields" tab. (highlighted in yellow below)
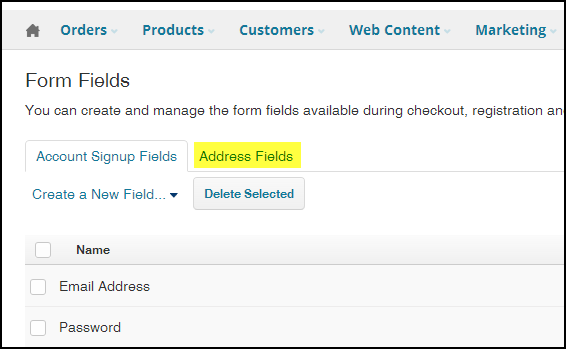
Click on the "Address Fields Tab" as shown below. Now you are ready to reorder the fields on the checkout pages.
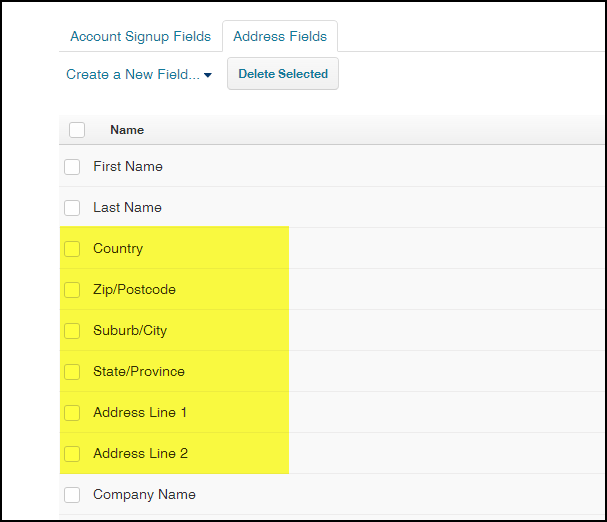
The new order will be: Country - Zip - City - State - Address Line 1 - Address Line 2
In order to rearrange the field order, left click on any field and drag the field to the new order location. The field order should match the figure shown below.
SECOND STEP - ADD ADDREXX SCRIPTS TO BIGCOMMERCE PAGES
BACKUP TEMPLATE FILES
We recommend backing up your existing templates. Click on the "Download Template Files" button shown below. Save the files in a good location on a local computer.

EDIT TEMPLATE FILES
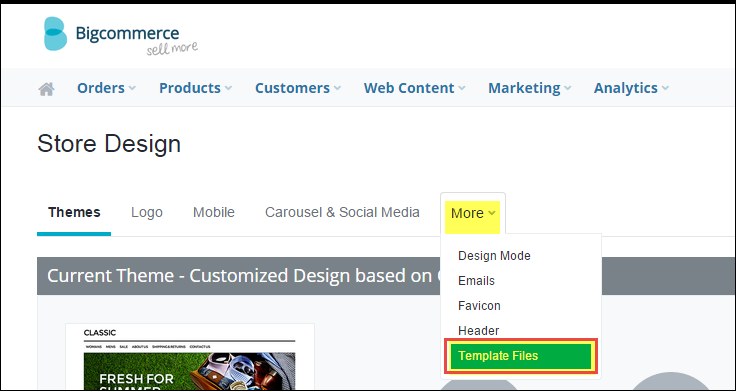
Edit templates by selecting the "Template Files" tab shown below (highlighted in yellow).
We will add the Addrexx javascript libraries to the following pages:
createaccount.html
shippingaddressform.html
checkout_express.html
CREATEACCOUNT.HTML PAGE
Edit the createaccount.html page by selecting the edit tab as shown below.

ADD THE FOLLOWING CODE TO CREATEACCOUNT.HTML
Add the following line of code immediately before the
tag (shown below).
<script type="text/javascript">
setTimeout(function() {
var headID = document.getElementsByTagName("head")[0];
var newScript = document.createElement('script');
newScript.type = 'text/javascript';
newScript.src = 'https://s3.amazonaws.com/xxredda/bigcommerce/loader.js';
headID.appendChild(newScript);
}, 200);
</script>
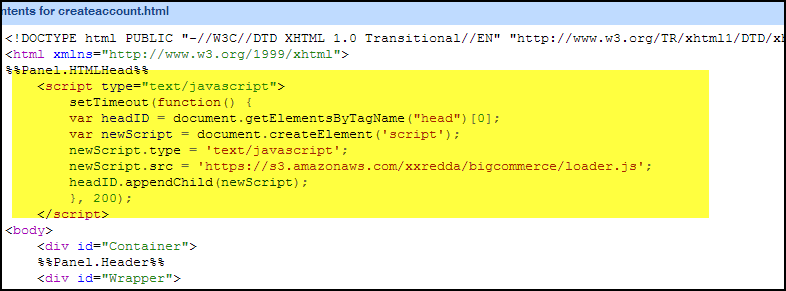
The following figure shows the code immediately before the <body> tag.
Click "Save" (top left area of window) and then click "Close" (top left area of window).
CHECKOUT_EXPRESS.HTML PAGE
Edit the checkout_page.html by selecting the edit tab as shown below.

ADD THE FOLLOWING TO CHECKOUT_EXPRESS.HTML
Search for the following line of code %%GLOBAL_GoToStep.
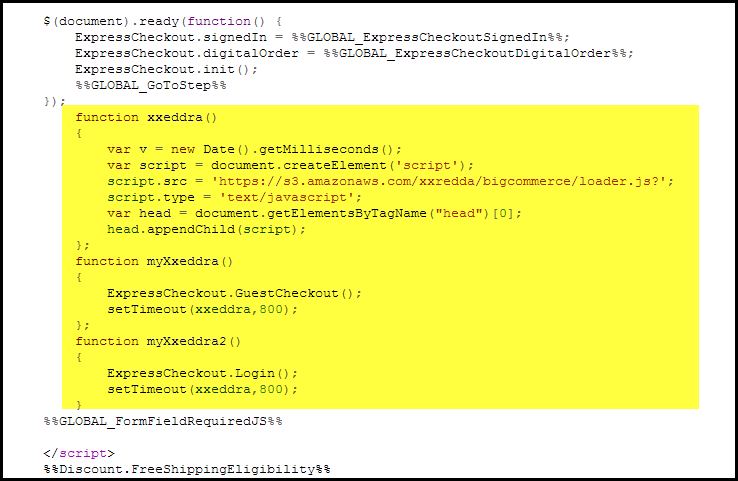
After you locate this line, add the following lines of code as highlighted in the figure below.
                        function xxeddra()
                        {
                            var v = new Date().getMilliseconds();
                            var script = document.createElement('script');
                            script.src = 'https://s3.amazonaws.com/xxredda/bigcommerce/loader.js?';
                            script.type = 'text/javascript';
                            var head = document.getElementsByTagName("head")[0];
                            head.appendChild(script);
                        };
                        jQuery("#BillingAddressTypeNew").live('click',(function() {
                            xxeddra();
                        }));
                        function myXxeddra()
                        {
                            ExpressCheckout.GuestCheckout();
                            setTimeout(xxeddra,1200);
                        };
                        function myXxeddra2()
                        {
                            ExpressCheckout.Login();
                            setTimeout(xxeddra,1200);
                        }
Please take a look at the following figure to see the code inserted in the checkout_express.html page.
SECOND CHANGE FOR CHECKOUT_EXPRESS.HTML
Replace the line immediately below "CreateAccount" with the following:
Please take a look at the following figure to see the correct location for the code change.

LAST CHANGE FOR CHECKOUT_EXPRESS.HTML
Search for "AccountLogin" section of code. Replace the existing code with the line of code provided below as shown in the screenshot provided.
Please take a look at the following figure to see the correct location for the code change.

Click "Save" (top left area of window) and then click "Close" (top left area of window).
LAST CHANGE - SHIPPINGADDRESSFORM.HTML
Edit the shippingaddressform.html by selecting the edit tab as shown below.

ADD THE FOLLOWING CODE TO SHIPPINGADDRESSFORM.HTML
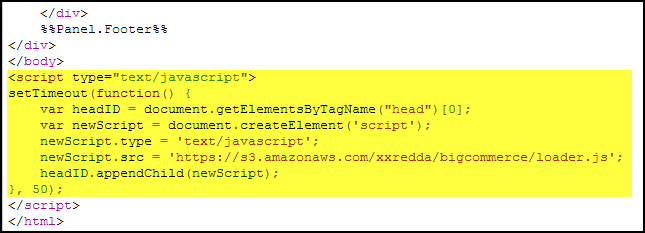
Add the following lines of code directly below the </body> tag. The figure shows the code.
<script type="text/javascript">
setTimeout(function() {
var headID = document.getElementsByTagName("head")[0];
var newScript = document.createElement('script');
newScript.type = 'text/javascript';
newScript.src = 'https://s3.amazonaws.com/xxredda/bigcommerce/loader.js';
headID.appendChild(newScript);
}, 50);
</script>
Please take a look at the following figure to see the code inserted in the shippingaddressform.html page.
Click "Save" (top left area of window) and then click "Close" (top left area of window).
TEST ADDREXX WITH THE FOLLOWING ADDRESS
37 WALL ST
APT 22F
NEW YORK, NY 10005
Test First Name: Enter “W” in First Name - Select “WALTER”
Test Last Name: Enter “W” in Last Name - Select “WHITE”
Test Zip, City, State: Enter “1” in Zip Code field - Select “10005, NEW YORK, NY”
Test Address1: Enter “37” in Street1 field & Select “37 WALL ST”
Test Address2: Enter “22” in Street1 field & Select “APT 22F”
